July 10

Compost for seed sowing part 2

I have started a compost for seed sowing trial as I haven’t been happy with seed germination this year. This is my second post regarding the compost so you can see part 1 about how I set it up here.

The seeds have started to germinate and it is interesting to see what has happened because the composts are not all equal.

The seeds in the Westland (pic 1) and Gardener’s (pic 2) compost germinated first and so are slightly bigger than the Sylvagrow (pic 3) and Jack’s Magic (pic 4). The PSB are up as are the chard seeds but in all the composts the chicory has not yet germinated. If my memory serves me correctly, chicory can take a little longer to germinate and it may be a bit too hot at the moment. 28 degrees C in the shade today so much hotter in the greenhouse.

The beans are a no-show at the moment but one is visible in the Gardener’s compost. And finally, the Geums.

They are all doing well but the second picture shows the Sylvagrow multipurpose compost and it dries out quicker than all the other composts and in this hot weather needs two waterings a day. The water also runs out of the pots much more when watering, suggesting that it is not being held onto by the compost. I would say that if I use this compost I will need to put trays underneath to hold onto the water that runs out and allow it to be absorbed throughout the day.

I’ll check in again when I transplant the seedlings which if they continue the same way that they are will not all be on the same day.

May 23

Making compost where you need it

Each autumn I start to run out of space in my compost bins and so make it on the beds. I choose one which needs a bit of oomph and pin down a wire basket. The beds that I put them on this time had had rhubarb on them for about 15 years and I have removed it because they harbour slugs which then crawled out from under the leaves and decimated whatever else I had planted in the bed.

I then fill up the bin which doesn’t take long at that time of year as the summer crops are being removed. I do layer with green, brown and manure, watering in between each layer just because I want this to rot down quickly. The bin was full in November but reduces down to about half 5 – 6 months later. There is usually plenty of nettles and comfrey which act as compost activator and help speed the process up. I don’t chop things up so I am sure if I did that it would be quicker and not quite so rough but I just don’t have the time at the point when I am building them.

Yesterday, I lifted the cage off the compost and spread it out over the bed. it took 5 minutes and there was no wheelbarrowing the compost from one part of the plot to another so was quick and easy. The compost is fairly rough and ready but does the job. I then planted squash plants – some of which have already been chewed by slugs!

Category: compost | LEAVE A COMMENT
December 21

18 day compost – December’s attempt

This post is part of my trial to build an 18 day compost heap each month of the year to see what happens – I wasn’t sure that it would work during the winter as the videos I had seen were made in Australia and other much hotter countries than the UK.  You can see November’s results here.

The issue in winter is gathering enough green material to make the heap  big enough and I didn’t manage that last month. So, I am no longer making the heaps on the beds where I want to spread the compost but on a spare bit of land I was going to turn into another bed but haven’t done so yet.  This gives me more space to turn the heap and to build bigger.


6th December 2020

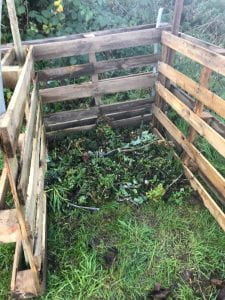
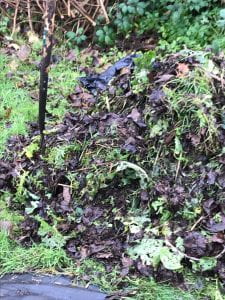
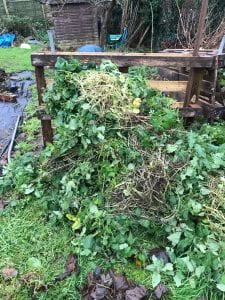
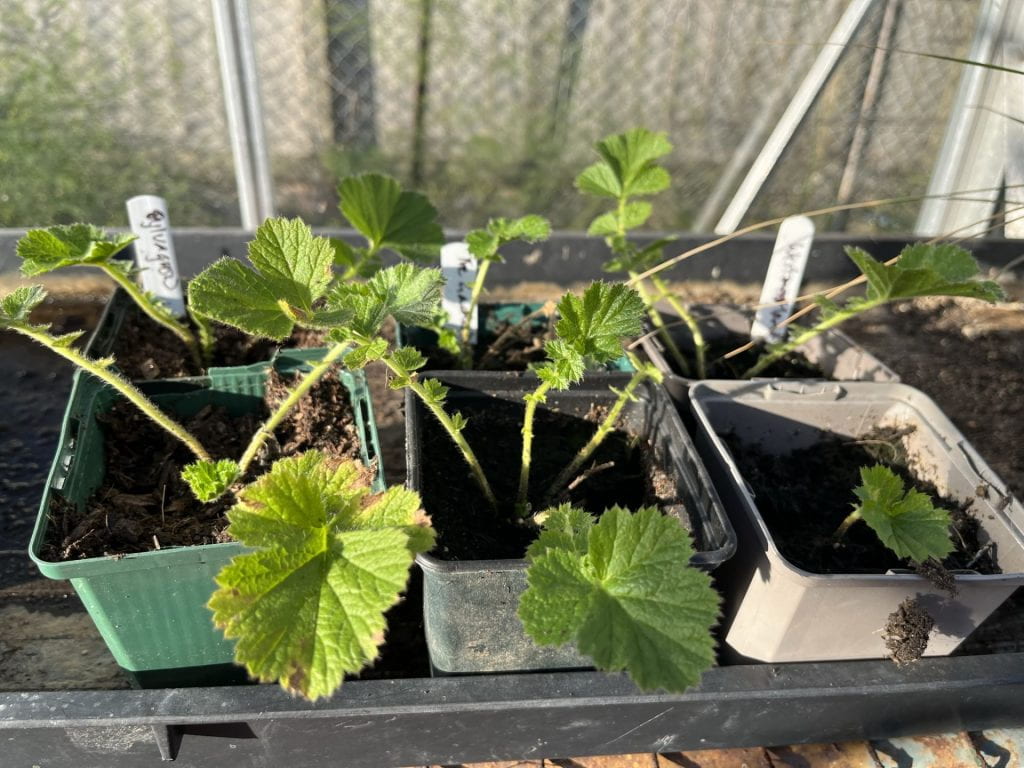
I can see why it is suggested that you have all your manure, brown and green materials and water at hand when you build the pile. I must have walked 10,000 steps getting everything in place as I built the heap; a lesson for January!  I did mark out the size of the heap with pallets this time but realised after I had lugged them around that I could just use 4 poles pushed into the earth next time.  Anyway, as I built the heap I also found that I didn’t have enough green material and so needed to cut down a bed of phacelia that I had sown at the beginning of October.  I had originally planned for this to flower in the spring and then cut it down because it was sown on a bed that had had strawberries for about 5 years and the bed needs a serious bit of work on the soil. I also managed to find a few comfrey leaves to add to the pile to kick start the process and I wetted the materials a LOT more than last time.

The pile is as big as I can make it and it is still not a cubic meter.  The limiting factors at this time of the year are green materials and if I am to make a pile in January, I am going to have to go out on a scavenge. I spotted some younger nettles and weeds on the way into the plots yesterday so will harvest them over the next few days to start my January pile.


10th December 2020

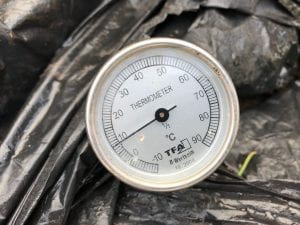
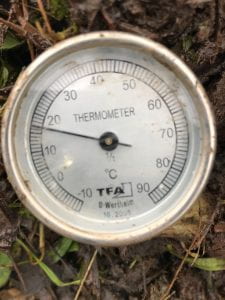
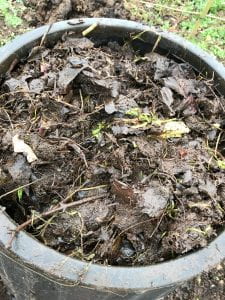
The heap had sunk quite a bit and was about 8.5°C which is no where near hot enough. Everything still looks the same and was damp enough so it was turned and covered for another two days.

12th December

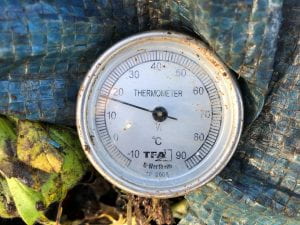
I forgot to take my camera with me but really the compost didn’t look any different to the previous turn. What was different, however, was the temperature. The heap had reached a high of 12.5°C, an increase of 4°C.  The next turn will probably need more water and I may add more green material and manure to see if I can get a greater heat. It will mean adding another 2 days to the making.

14th December

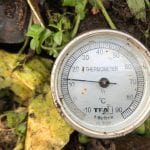
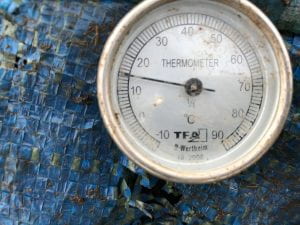
The temperature has gone up 0.5°C to 13°C so at this rate it will take me another 70 days to reach 50°C!  The materials still look the same and I am now half way through the 6 turns. I have decided not to do anything to this pile but to just leave it. I know I need to add more green material and manure which means that thirds of green, brown and manure are not the right proportions for this climate at this time of year.  Is it thirds by volume, which is what I do, or by weight? The manure is obviously heavier than the other two materials.  I will experiment a bit with the January pile and add a LOT more green material. I am the mad, scavenging woman out around the town picking nettles and dandelion leaves so that I am ready! Oh, and there were two worms in the pile.

16th December

I think I might go as far as to say that the temperature is now up to 17°C, up 4°C on yesterday.  It all still looks the same although a little more brown and I have removed the thick stalks and whole beetroot. Those were just wishful thinking!

I have been out and collected the nettles and weeds outside the allotment gates and there is quite a lot. If the January pile doesn’t get quite hot with all of these nettles, I don’t know what will.

19th December

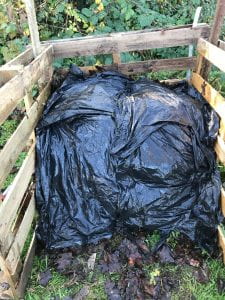
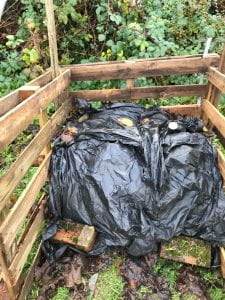
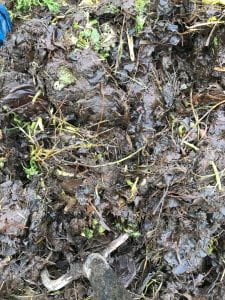
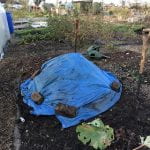
The weather was so bad on the 18th – 30mm of rain throughout the day – that I couldn’t/didn’t want to go down to the allotment so the turn of the pile was 1 day later.  You can no longer identify the phacelia but the weeds which were not ripped up are still visible as is all the brown stuff although all are much more mixed up now.  The pile is wet enough because the tarpaulin is woven and quite a bit of rain from yesterday go through.

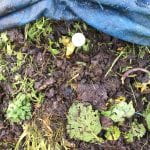
The temperature is down half a degree to 16.5°C so I am wondering if peak temperature has been reached or whether the lack of turning yesterday has slowed the process down.  There were three worms in the pile. These are worms from the ground and they are only really in the lowest layer but every little helps!

21st December


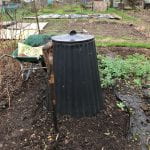
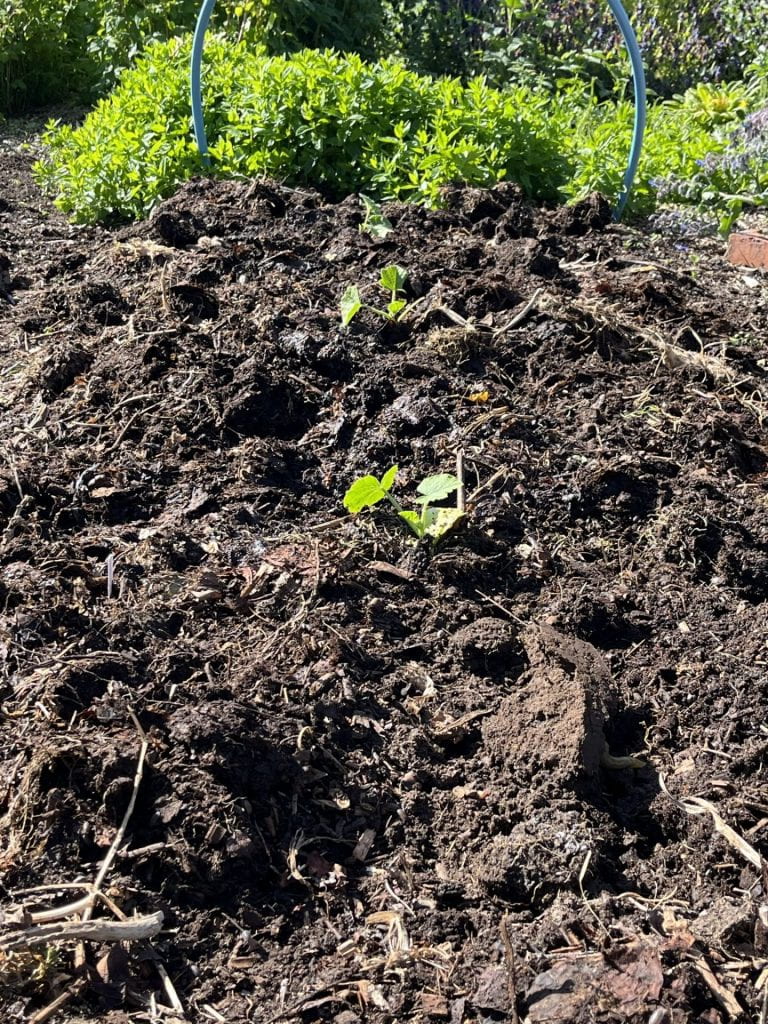
The temperature is going down now – 14.5°C  today so unless I add some more green to the pile it will not get any hotter. For the final turn, I moved the heap to a dalek bin, or as we call them at home rat bins, that is on the bed where I want to use the resulting compost eventually.  I will leave it in here a couple of months, still taking its temperature every week or so just to see what happens.  The bin is full to the lid and the compost is quite wet – probably as wet as it should be because I could squeeze out a drop of water but it is wetter than I would normally allow compost to get. Maybe that will stop the rats taking up residence in it over the next month!  It also smelt a bit which tends to suggest it is a bit anaerobic which is not helpful.

So, what am I going to do differently with January’s pile?

  • Make it at least a cubic metre, all packed down. No airy-fairy trying to make it look like a cubic metre when it isn’t!
  • Chop everything up quite small. This is not the sort of compost making that will rot down large roots, whole beetroot and Spanish radish. This needs premium materials in premium sizes which means I will need to take the leaves home and run them through the lawnmower to chop them up and add a little grass.
  • If it doesn’t show signs of getting anywhere near the heat needed, I will add more green and manure and a couple of turns.

Happy Christmas to you all.

December 14

Different ways to make compost

I have become obsessed with compost this winter. I think it is because I don’t dig, just put compost on top of the beds each year. I garden on sand so the normal 3-5cm placed on top of the bed is not usually enough to last a year and so I go for 5-7cm+ and I never have enough!

By the end of the year on beds where I have added less it looks like nothing, zero, nada has been used.

I make compost in three ways and use each slightly differently: cold compost, hot compost and worm compost.

The cold compost is the way I usually make compost – I just fill up my compost bays and wait a year or slightly less to use it.  I didn’t realise that this way of making compost was also called the Lazy Method but having just started to make hot compost, I can see why it is called that.

This video from Huw Richards explains exactly how I make it apart from the jumping up and down on it.

The advantages of this method for me are that it involves less work, I don’t turn it at all and I put all the couch grass and roots and bindweed in it and they do not cause a problem. I also put all my tomato and potato plants in blight or not as blight is an air borne disease not soil borne.  The disadvantages are that my heaps do not get hot enough to kill all the weed seed and so, I get weeds germinating when I spread the compost. The answer would be to remove all the weeds before they start to flower and every year I try but fail at some point.

Charles Dowding also makes compost in this way but turns his twice. Once into the next compost bin and once when he moves it and stores it ready for the winter-time spreading.

Then there is hot composting which I am trialing at the moment.  I make this and use it on specific beds because I don’t have any other compost left and only have to wait 18 days to make and use it this way – in theory. It’s not turning out like that at this time of year but it might also be that I haven’t refined what I need to do well enough. This video by Richard Perkins shows the Berkeley process really well and having watched it, I can see where I have gone wrong!

The advantages of this type of compost are that it is quick and weed seeds are killed. The disadvantages are that it is a lot of work turning the pile every two days, especially when the pile is not in the back garden. The other disadvantage is that I am struggling to get enough green stuff at this time of year (winter) and in summer I may struggle with the brown stuff.

The final type of compost I make is worm compost or vermicompost. I make this at home where I have two specially made bins.  This video by Geoff Lawton shows how to make worm compost on a large scale and I would like to try this on the allotments if I can find an old bath.

The advantages of this method of composting are that you get the two products – a liquid feed and compost or really a fertiliser that you can use on plants that need it or things like tomatoes, cucumbers and aubergines. The disadvantages are the scale of manufacture – my two bins don’t produce anywhere near this amount and the worms do need insulating during winter as they stop working/die if it is too cold.

You can try worm composting on a very small scale with a worm tower. I might give this a go near to a plum tree which I have recently had to move and put in soil which does not look to have had much added to it in the way of compost in the last few years.

How do you make compost and can you make enough?

November 29

18 day compost in November – really? Update

On the 6th of November I created a compost heap and followed the Berkeley method of hot composting as I was sceptical that it could be made in that time in November in the UK.  Well I was partially right and partially wrong!

These pictures show you how the compost looks now and I can’t deny that it looks a lot like compost that is ready to use. There are a few elements that look like they originally did and I removed those as I spread the mound over the bed.  I made it on the bed I am using it on to save barrowing ‘stuff’ around and because I would have to find space if I didn’t. However, the heap did not heat up anywhere near the necessary temperature so I would say that means that the weed seed in it is still viable and will grow when the conditions are right.  I will come back and update this post when I know how that goes.

I can think of two reasons why the heap didn’t heat up.

  1. It wasn’t big enough. It needs to be at least a meter cubed and mine wasn’t.
  2. It needed more moisture. I watered it several times but could not get a single drop of water out when I squeezed it.
  3. Oh – there’s a third! It might have needed a bit more green in it. Green is in short supply at this time of year and brown is in the summer. You just can’t win.

To prevent the weed seeds germinating, I have covered the bed in woven black plastic that I keep for just such an issue. (No need for a picture of this. You can all imagine it!) For some reason, an overwinter cover seems to inhibit weed germination once the plastic is removed.

So, I will gather all the stuff together for another heap. I have a cleared bed I can make it on and try to remedy these three problems. I wanted to make a heap each month but it might take me a little longer than a week to get enough green. I am going out on a nettle hunt over the next few days to see what I can find and I probably do have some weeds somewhere! I could also cut the lawn on a dry day.

One other thing I will do differently in the next heap is to think about what I include. When I looked again at Geoff Lawton’s video it did all seem to be leafy material, both green and brown, rather than twigs, large clumps of grass etc. I can put those things into my cold heaps where they will rot down. I will document more clearly what goes into my next heap and by the end of 2021 I should have got to grips with hot composting.

See the results from December here.

Have you tried this method of composting? How did it go?

November 8

18 day compost – really?

I love a trial and so my big trial for the next 12 months is about making compost in 18 days and whether it can be done here in the UK. It is called the Berkeley Method, developed in California and explained here by Geoff Lawton in Australia.

Now, both of these places are warmer in general than here in November so I am not sure that it will only be 18 days before I have compost. I think it will take longer but I would like to give it a go so I am going to make a heap each month to see what happens. I will also make a cold heap and turn it out in March to use just to compare the two because the 18 day, hot compost is a lot more work.

I don’t really have the space to make more compost heaps so I have decided to make them on the beds and then turn them out and use them where they have been made. That way I cut down on the amount of barrowing around that I need to do.

The materials I have used are cow manure, carbon to nitrogen ration 20:1, grass clippings 25:1, shredded raspberry and blackberry canes 400:1, chopped up leaves 150:1 and weeds 25:1.  These are approximate ratios and I wouldn’t normally bother with this but it just shows that I need to add more of the green stuff to try and get nearer to a 30:1 ration. I have layered them and guessed that I have about the right volume. In the middle I have put an activator of comfrey leaves, about 2 litres because it is November and may be slower to get going.  I am interested in the idea that we are not aiming for a drop in size of the heap but really to get the carbon to lock up the nitrogen to be released for organisms in the soil when it is finally spread.

I will be back in 18 days with the results.

An update on the heap 20 days later can be seen here.  See the results from December.

April 1

Keeping busy …

Gosh, it’s a difficult time at the moment. I have been holed up in my house for about 15 days now and can see this going on for months and months – in fact, until we get a vaccine for Covid19. We are still able to walk around so I can get down to the allotment but have been thinking for some time about growing some vegetables in my garden. In the past, I have wanted to keep the flowers and vegetables separate but found myself wondering what would happen if we went into a ‘total lockdown’ like Spain or Italy and I couldn’t get to the allotment even though it is only 5 minutes away.

Over winter, I removed a hedge as I wanted to replace it with fruit trees and have started to plant some – a cherry bush Porthos and an apple, Christmas Pippin, which I am espaliering.  However, I have now decided to use the space to grow vegetables as well.  I have become more and more interested in saving my own seed and so have decided to grow only open pollinated seeds in the garden where they will not cross with F1 plants which I have on the allotment. I have started to create the beds and planted out my Ailsa Craig onions under fleece yesterday. I grew these from seed, sowing them mid February, and am hoping that they don’t bolt as easily as sets sometimes do.

The other thing that I have become much more interested in is Permaculture and its principles.  I had started to tidy  where the hedge had been but had three tree trunks that were quite old and starting to rot down and wasn’t sure what to do with them. I can’t take them to the tip now and one is too heavy to move. I thought about putting them behind another edge on the other side of the garden to rot down but really they would just get in the way there.  Then I read about Hugel beds.

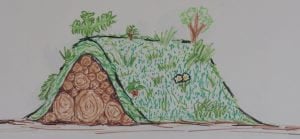
These are made out of materials that are generally lying around the land but have a core of wood at the heart. The idea is that wood, leaves, twigs, compost soil and turf are layered on top of each other to create a mound which rots down slowly over time.  Vegetables and shrubs can be planted into them and are reputed to perform very well.

Being an impatient sort of person, I started straight away. I marked out an area where the bed was to go. The advice says to put it so that the prevailing winds hit it sideways on to provide some protection for what is behind. I have managed to do that and therefore protect the vegetable beds behind it.

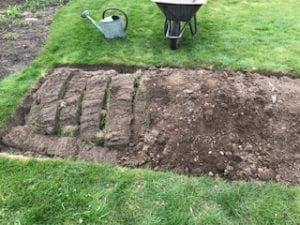
You have to clear the grass and then dig down so that the trunk is buried a little bit. This helps it to act as a water soak and to be in contact with more soil which will help it to rot down.  As a no-dig gardener, this part is proving to be difficult. It just feels wrong to dig and because I don’t dig, I have managed to rub blisters in several different places on my hands just removing the turf.

Once the grass was cleared and I had dug down 1 fork’s depth, I rolled the trunk into the pit and then packed all around it with twigs, old grasses I had cut down and then weeds.  I trampled all over these until they had all squashed down and were quite compact.  Then I laid all the turf over it again but across to try and hold the ingredients in.

I watered it thoroughly and then started to put the soil I had dug out back on to of the turf. You can see both in this picture. I have to admit, it is starting to look a lot like a burial mound.  This is as far as I have got for now but intend to top it with home made compost and possibly pin some twigs the length of it down the sides to act as little shelves for the plants because I am worried that when it rains everything will just run down the sides.  Then I will plant into it.  The far side in this picture faces south-west so I will probably put lettuces this side and more sun-loving things the other side.  I am also presuming that it will be damper towards the bottom of each side and drier on the top so need to plant accordingly. More photos of this in the next post. I have to say that this has taken me days and in the meantime, I made two beds that are bigger than this my usual no-dig way in 2 hours this morning. Just cardboard and compost on top of the grass. And I didn’t get any blisters doing it!

What are you doing in the garden to keep busy?

December 3

Covering it all up

This is the month where I start to cover the beds that are empty and wonder how much more compost I need to make next year.

I have a mix of 2yr old manure and compost that I have made myself over this year and I am trying to remember what I put on each bed last year so that I can alternate: compost one year, manure the next. I don’t think this is necessary but I think each has its own type of goodness and the plants might benefit from a range rather than one thing.

The parsnips are ready so we have started to eat them. They are enormous – perhaps a little too big – so I think I need to sow them a bit later next year. I think May should be early/late enough. Perhaps I should sow some in April, some in May and some in June. I definitely need better notes than I kept last year about when I sowed things.

I sowed some broad beans in the greenhouse on the 10th of November and planted them out on the 4th of December. They are tiny in comparison with many other plots but should catch up. I also planted about 12 in the polytunnel which is not enough so need to sow more.

Today, I harvested parsnips, kale, leeks, sprouts, radicchio (not sure if I have spelt that right!) and parsley. I have a few peppers left on a plant in the polytunnel which I will need to pick soon or they will rot.

One of the things I will be doing this month is searching for other vegetable/gardening blogs to read and learn from.  So far I have found

Our Plot at Green Lane Allotments

Sharpen Your Spades 

What are your favourite vegetable growing blogs?


November 11

What I have learnt this year

As I come towards the end of my no-dig year I realise that I am a convert. So many of the vegetables and fruit did better than I have grown for some time.

What I have learnt about compost/manure

  1. Only use well-rotted manure. Mine was too fresh and sat in lumps that slugs and snails could hide in.
  2. Seaweed works well and plants love it but it works even better with some compost on top.
  3. It is a struggle to make enough. I have two allotments and probably only make enough for one plot.
  4. Leaf mold is good on the sandy soil. It works even better with a topping of compost.

Successes

  1. The squash have been fantastic. Only one of my Crown Prince squash plants survived but it provided five squash. Usually I have one plant, one squash although I did see that Charles Dowding managed six off his plants so still a little way to go.
  2. Sarpo Mira potatoes were fantastic and I will definitely grow some of these next year. Thank you to John for sharing his surplus plants. I only had four seed potatoes but the crop will probably last us all winter.
  3. The leeks are enormous!
  4. The kale is big and healthy and I actually managed some red cabbages this year.
  5. Flat leaf parsley is hard to keep up with and my lemon grass is doing really well in the polytunnel.

Things that didn’t work so well

These things are not because I used no-dig rather than the weather or my lack of knowledge.

  1. My onion sets had rot but my seed-sown onions didn’t. Next year I will grow all my onions and shallots from seed. I planted the onion sets in lumpy manure and the slugs and snails dined on them.
  2. The Celariac are much, much bigger than previous years but the wood lice have taken up residence in them.  The compost was well-rotted so I will just have to try again.
  3. My garlic was thrown by the cold spell in spring and thought it was winter again. This year I have planted half outside and half in the polytunnel.  We shall see what the difference is.
  4. I need to keep the grass a bit lower and remove the grass hanging over the edge of beds. Slugs and snails hide there!

What has worked well for you this year?