Flow in permaculture
If you know the TV programme The Fast Show, you will be familiar with Jesse and his sayings “This week I have been mostly …” I am looking a bit like Jesse at the moment because I really need my hair cutting and we have very strong winds so
This week I have been mostly looking at flow and pattern!
We have already covered the flow pattern called succession and are now concentrating on the flow of energy in wind, water and I am also going to include people in this because they are relevant to my site. The main focus of our work has been what happens when the flow meets an object – how it moves around it and how that differs depending on the speed or velocity of the flow and applying that to our patch of land.
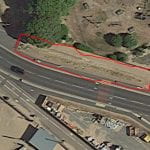
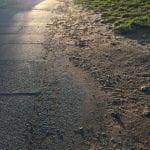
 Because my patch of land is right by the sea, flow has had a very obvious impact on it, creating the dunes in the first place but wind, water and people continue to shape it. It starts at the eastern end at the entrance/exit to a temporary car park which is necessary for the influx of visitors in the summer. The beach, however, is the other side of the road so most people that come out of the carpark need to cross the road and the quickest way to do so is walk up the patch of land to get to the edge of the road. These shortcuts, known as desire lines, usually show designers where they have got things wrong! They are the paths or flows of least resistance and the land can become quite eroded depending on the number of feet that pass by on them. The path also doesn’t go straight up or down but comes in at an angle.
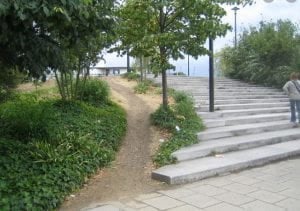 It would be quite possible to build a set of steps here that flare out at the bottom, mirroring the erosion but would what happened in this picture happen because we know it is just quicker to walk up. Actually, in this instance I would formalise that path as well so that people have a choice about which to use.
In fact, desire paths are so common, and in some instances so fascinating, that Reddit users document them.
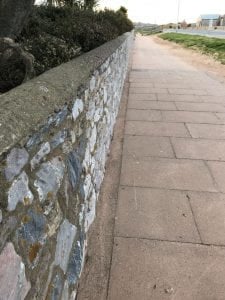 I have talked about the wind and the impact it has on this patch of land and some of its edges before but this patch has one difficult, solid edge where a wall and pavement meet. In a southerly blow, the sand hits the wall and drops to the base where one of the road sweepers that keep the beach area looking neat and tidy sweeps up the sand and puts it in his cart to empty it else where I am presuming. I have often wondered what would happen if they didn’t. Would that paved area fill up eventually and join up with the dune/land at the same level?
Contrary to most edges, I think this is one of those edges that does not increase yield or create a third space that is richer than either side of it.
Are there any lines or paths of desire on walks you do?
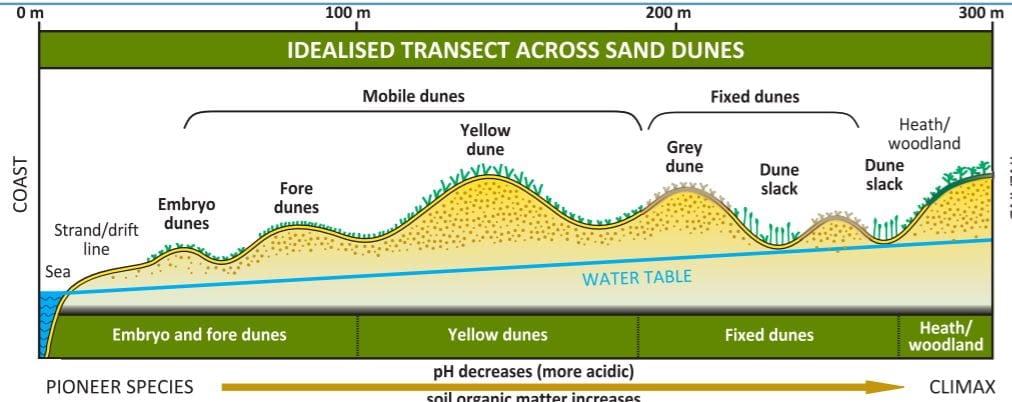
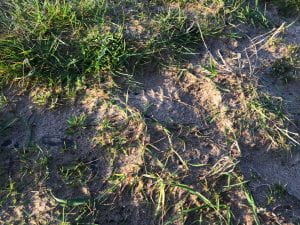 In order for sand dunes to be made, you need two media, sand and wind, where the wind blows sand, deposits it and then blows it away again. In geographic terms, deposition and erosion. Whilst the dunes behind the beach are quite stable, this piece of land has mini dunes on it. The wind blows the sand which gets trapped by the grass on the land and is then eventually blown off, hitting the wall opposite it and deposited at the base of the wall. The ripples in the sand come from the patterns on the base of trainers rather than anything nature has created. Although hard to see, the pattern is again a wave pattern.