This is the second in a series of four posts about harvesting rainwater on my allotments using the permaculture phrase of sink it, slow it and spread it. You can read part 1 here with this post following on by sharing the observations and research I have done regarding my specific site and strategies that might be successful.
The first thing I looked at is the average rainfall for the area in the last row.
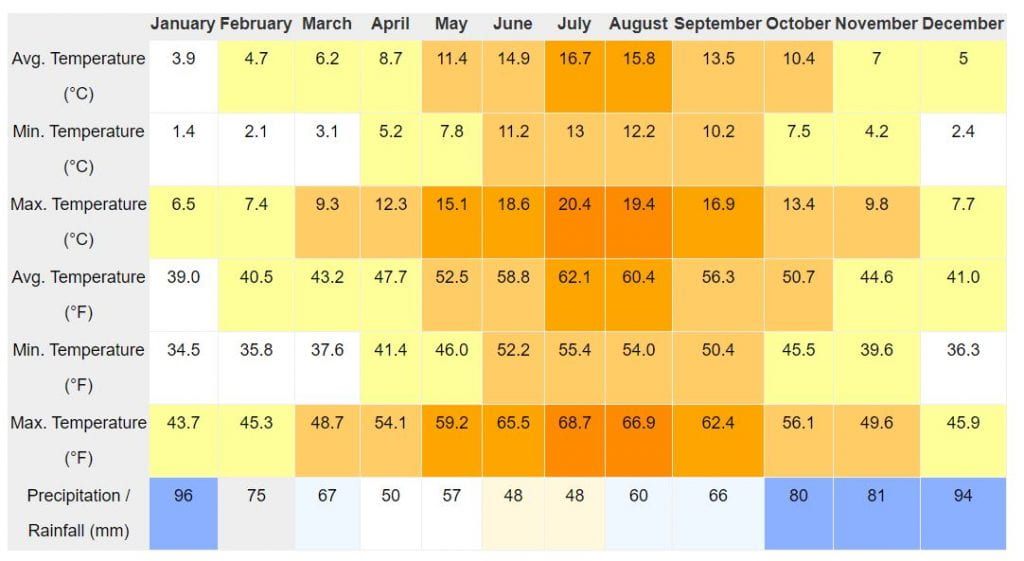
I recently started to use a rain gauge at home and our rainfall in October was exactly 80mm but December 20 had 145mm of rain which reminded me of the wet parts of my plot and garden. The chart shows that we get approx. half the rainfall of the winter in the summer. So, where are the wet parts on the plots? The first is behind my polytunnel.
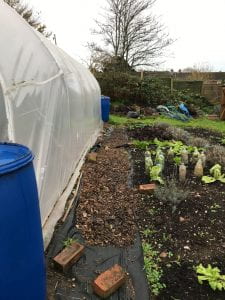 Most of my paths are woodchips and some have black woven plastic underneath them to stop the weeds. This path becomes very soggy in winter, it is now, and sometimes water can sit on it after a heavy rainfall. This is because the guttering is only on the ends of the tunnel and the middle has none so rain slides down onto the path. The rest of the allotment slopes gently down from this point to the fence at the end which separates the plots from the gardens of the houses behind us. In his book Harvesting Rainwater Vol 2 by Brad Lancaster, Lancaster mentions that soil beneath plastic becomes anaerobic and you don’t get the soil organisms you are after for good drainage so it probably does need to go.
As you can see, I have a water butt on each corner of the tunnel but two of the gutters need to be replaced. I would do it now but actually they stick better when it is warmer so that job will need to wait. The warmth also means that the guttering is easier to straighten. It comes in a coil and needs to be manipulated to ensure that it makes a good contact with the plastic sheeting and flows over the hoops smoothly.
There is capacity for more water storage by adding another water butt linked to each of these and this would capture more water in winter but I don’t know if they would fill during the summer. A few calculations about surface area and rainfall would help me decide that.
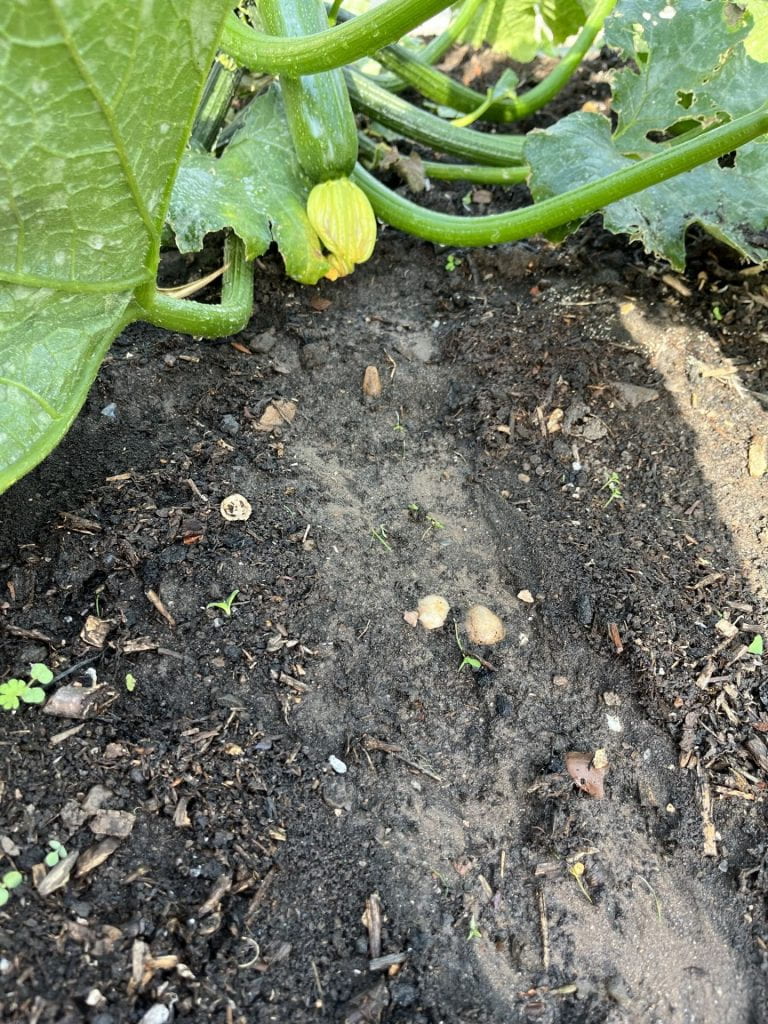
The second damp place is behind my polytunnel on a bed which I don’t use much with a path into the tunnel. I only use this path if I have to get water from the tap. I recently decided to put these beds back into use. They are shaded for most of the day so I will need to plan carefully what to plant there. To get the beds ready, I covered the ground with cardboard, watered it and then put compost on top. When I watered the cardboard, I watched it run straight down, across the path into the tunnel and onto the next bed so there is definitely a slope there which could be used to slow the water down and sink it into the ground.
The wind can be quite strong on the plots because we are towards the top of a hill that comes straight up from the sea (both land and wind). Wind maps show that we get wind from all directions with most coming from the west and certainly at home we have a large sheet of glass (window) at the end of our lean-to which stops the westerly winds hitting us. I would say that most of our winds are southerly to westerly and I particularly like this little widget which shows what the wind is doing now – strength and direction.
As I write this post, the wind is southerly but has quietened down from earlier this morning.
The final thing I needed to do was to find out how steep the slope is on the allotment. I used an app on my phone and just put it on the ground at various points. Not very accurate but it will do for my purposes – the slope averages about 5%, more in some places and less in others. This measurement is important because certain water management involving moving soil is not recommended for slopes that are more than 5% such as swales.
So, my plan of action:
- Remove the plastic from the path alongside the tunnel, dig a small ditch towards the beds and then put in a mountain of shreddings. This will mean the water from the tunnel will drain into the ditch but I can still walk on it. The water can then work its way down the slope in the soil. Over time, I will remove the plastic on all the paths.
- Add a second water butt to each one with a hose pipe to siphon the water between the two. This stored water will be used during the dry spells and will probably last me 4-6 weeks if I only water the tunnel, but far less if I have to water plants outside, which I do some years. The allotment shop is open again in February so I will get three more water butts.
- To explore the best times to water fruit and vegetables so that if I do have to water them, I get maximum bang for my buck (or water)
- Continue to mulch the beds each year to increase their water-holding capacity. The soil is sand on a bed of stones and so drains very quickly and retains little moisture or goodness.
- To remove the black plastic under the plum tree, clear the weeds and plant a guild around it so that it can access more water. I don’t irrigate the tree but I know that other fruit trees on the plots perked up and grew more vigorously when I removed the black plastic underneath them.
I’m off to dig a ditch!
Are you able to store enough water so that you don’t have to use tap water?